Tuesday, January 29, 2013

Tuesday Daily Project at Exploring Cricut

Welcome to my Tuesday Daily Project that I am sharing over at Exploring Cricut today.  My granddaughter Peyton has a little friend who has a birthday soon and she loves Hello Kitty so I made a card for her to give her friend Savannah.  I used the cartridges Hello Kitty Font and Batman The Brave and the Bold for this project.  Below the picture are the cuts and materials.  Be sure to join the challenge over at Exploring Cricut this week too!!!
Hello Kitty Font-HK6 cut at 4.5 all layers
Batman-Thought bubble shift cut at 2 inches
Stamp-something in stash with no name sorry
Pattern Paper-Hobby Lobby
Cardstock-Recollections Michaels
Stickles

Monday, January 28, 2013

Sharing post today Exploring Cricut & Cricut Fanatics

Welcome to another Exploring Cricut Challenge and Cricut Fanatics project. For our challenge at Exploring Cricut , it is a 1, 2, 3, challenge.  You are to make any project you would like using your cricut and cricut cartridges but must include at least 1 embellishment, 2 pattern papers, and 3 cricut cuts. I am sharing a easy Winter tissue box cover. I also have the post today at Cricut Fanatics so I thought I would do this as a joint project. I got this pattern a few years ago from Splitcoast Stampers.  It is easy and fun to change out for seasons and holidays.  I will give you step by step directions with pictures. I am also entering this in the Pumpkinspiceblog.blogspot.com challenge this week.


I use the Walmart brand tissues which is the same size as Kleenex.  You will need to cut (2)  5 1/8 x 9 1/2 pieces of cardstock for you base.
Cut one 9 9/16 square piece of cardstock for the lid.  You will also need (4 ) 4 1/4 x 4 inch pieces of cardstock or pattern papers for the sides.  You will also need one 4 1/4 square piece for the top.
Score your long pieces at 1/2 and 5 inches
I used scor tape, but something that will hold securely to put the pieces together to form base.
You score the lid piece at one inch on all four sides and cut as shown in the picture to fold for the lid.
To form the opening in the top I used Spellbinder dies and used the 3rd one in the set of large ovals.
Put your lid together with scor tape and it will fit on the base.  I go ahead and tape the insides of the lid to secure it to the base so that it does not move or come apart.
I added the side panels and started to decorate.  With the second piece for the top, I added another Spellbinder die labels one middle size for my top.  I embossed the top piece with the snowflake Cuttlebug folder.  Here are the rest of the materials I used.

Winter Tissue Box created by Diane Kielman with pattern from Splitcoast Stampers
Machines used-Expressions 2 machine, Cuttlebug, and Gypsy
Pattern paper-Bo Bunny
Cardstock-Recollections
Other-jewels, ribbons and stickles
Cuttlebug folder-Snowflake embossing
Cricut Cartridges-Art Philosophy- snowflake1 page 22 shift cut at 3.25 and 5 inches  Layer shift cut at 3.25        inches.         
                                                      Snowflake2 page 27 shift cut at 2 inches, layer cut at 1 1/2 and 2 inches
                                                      Letter K cut at 1.5 inches in two colors and just off set from each other
                           Snow Friends-snowman cut at 4.5 inches face stamped with Peachy Keen stamp
                           Sesame St. Seasons-hot cocoa cut at 3.5 inches and removed word hot                                

Wednesday, January 16, 2013

Magazine Inspired Cards

I normally do not copy ideas, but I bought this magazine Saturday at Joann's to use my 50% off coupon since I hardly get to go do to that we have to drive 65 miles to get to one!  It is called Simply Cards and Papercraft.  I get another one similar to this, but first time I purchased this one.  They had some wonderful Winter cards and I copied a couple of the designs with some differences.  I love pinning things on Pinterest too so I think I will try to do something in either a magazine or Pinterest once a week.  I crafted a lot, but do not always post to the blog and I will try to do better.  This first card is made entirely of scraps which is a good thing.  I try to use as many as I can. I used the Artiste cartridge for both cards.   Below the picture are the details on each card.
Pattern Paper-scraps from either Michaels or Hobby Lobby
cardstock-Bazzill
Snowflake cuttlebug folder
ribbon from $1 bin at Michaels
jewel is one in stash
Ink Lagoon-CTMH
Stamp-unknown
Artiste cartridge-snowflake page 79 accent 1 shift cut at 2.5 inches
                          tag page 33 accent 3 cut at 1.75 inches
Pattern Paper-Pebbles Inc scrap
Cardstock-Bazzill
Ribbon-stash
Punch from Stampin Up for the blue trim
Stamp-Stampendous
Ink Moonstruck-CTMH
Artiste-tag page 31 accent 1 cut at 2.5 inches and 3.5 inches

Tuesday, January 15, 2013

Tuesday Daily Project over at Exploring Cricut

Welcome to our Tuesday daily project over at Exploring Cricut.  I turned this thrift store find into a really cute winter scene picture.  The inside of the frame measures 5.50 x 5.50 so it was not that big and I knew my items would have to be small.  The picture does not do it justice, very beautiful, but lots of rain and cloudy when I took the pictures.  I used the cartridges Winter Frolic, Christmas, and Christmas Cards. Below the pictures are my details.  Be sure to enter the challenge over at Exploring Cricut too!

Shadow box frame from Goodwill store for 1.50
Gave it a fresh coat of white paint.
Cartridges:  Winter Frolic-Winter Wonderland title cut at 1.5 inches
                   Christmas-house cut at 3.25 inches
                                    trees cut at 2.5 inches
                   Christmas Cards-horse and sleigh cut at 4.5 inches
Cardstock Bazzill and Pattern Paper some old Chatterbox in my stash
Eucalyptus and crystal stickles

Monday, January 14, 2013

New challenge at Exploring Cricut today

Today we have a new challenge starting at Exploring Cricut.   The challenge is called "Baby It's Cold Outside".You are to create a card, layout, or papercraft of anything for winter or snow.  It can be something that reminds you of winter.  The only requirement is to use your cricut and cartridges.  Please join us this week for this fun challenge.  I have created a 2 page layout for this challenge.  I used the cartridges Winter Woodland and Winter Frolic.  I had a great time with this because my little granddaughter just got her wish for snow right after Christmas so she could make a snow angel.  Below the picture is the directions and supplies.

Cartridges:  Winter Woodland-snow day title cut at 3.5 inches
                                                brrr cut at 2.25 inches
                  Winter Frolic-snow angel cut at 3.75 inches
                                       sledding kid cut at 4.25 inches
Supplies:      Pattern Paper from Bo Bunny
                   Cardstock from Michaels
                   Snowflakes from Martha Stewart Punches
                   Jewels from Kaiser Crafts
                   Stickles from Ranger

Friday, January 4, 2013

Hey it's me again....filling in

I am filling in for the Friday daily project at Exploring Cricut.  Another of the design team Lori is down with this nasty flu so I have done a quick card for you today.  I used the cartridges Phrases and Lacy Labels.  Below the card is my directions and materials.  Be sure to enter our challenge this week at Exploring Cricut too. I have also entered this in the Die Cuttin Diva's Challenge this week too!

Card Base is 5 x 7
Pattern Paper is Bo Bunny from my massive paper stash lol
Cardstock is Michaels and Bazzill
Buttons-snowflakes in stash from Walmart
Jewels-Kaiser Crafts
Stickles
Martha Stewart Border Punch
Phrases-thank you cut at 2 inches
Lacy Labels-snowflakes and stars cut at 5 inches (did not use stars)

Wednesday, January 2, 2013

Filling in at Exploring Cricut today

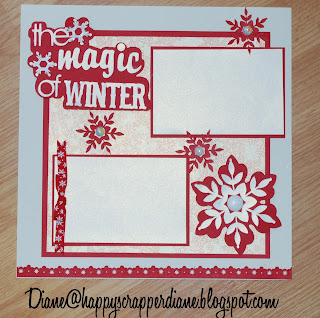
Today I am filling in for Jessica at Exploring Cricut who is battling with a bad case of the flu.  Get well soon Jessica.  Well you are getting the fastest page I think I ever put together.  I used the cartridges Winter Woodland and Art Philosophy to create it.  We just got some snow so I know I will be able to use it. Below the picture are the materials and directions.
Winter Woodland-title cut at 3.5 inches
Art Philosophy-snowflakes cut at 2 inches and 3.75 inches
Pattern Paper-red and white snow flakes by Reminisice.  (older paper in my stash)
Cardstock -Bazzill
Jewels-Jolees
Border-Martha Stewart Border Punch

Tuesday, January 1, 2013

Tuesday Daily Project at Exploring Cricut

Happy New Year to all my blog friends!  May the new year bring you joy and happiness along with lots of crafty time!  I am hoping to get more in myself.  Today, I have the daily project at Exploring Cricut.  I made a two page layout using the cartridges Martha Stewart Seasonal Cake Art, Winter Frolic, and Quarter Note.  I will have a ton of pictures from my little granddaughters Christmas concert so I thought I would start making some pages.  Below the picture are my cuts and materials.  Be sure to join in our New Year's challenge this week too!
Cartridges- Martha Stewart Seasonal Cake Art-time for tea font title Christmas Program cut at 1.25 inches
                  Winter Frolic-carolers cut at 5 inches
                                       musical border cut 2 inches
                  Quarter Note-music notes cut at 1.75 inches
Pattern Paper-Simple Stories December 25
Cardstock-American Crafts
Black Stickles